
How to Take a Screenshot on Windows?
Use Windows + Shift + S to select an area, then check the preview and save or paste your capture.
Use Windows + Shift + S to select an area, then check the preview and save or paste your capture.
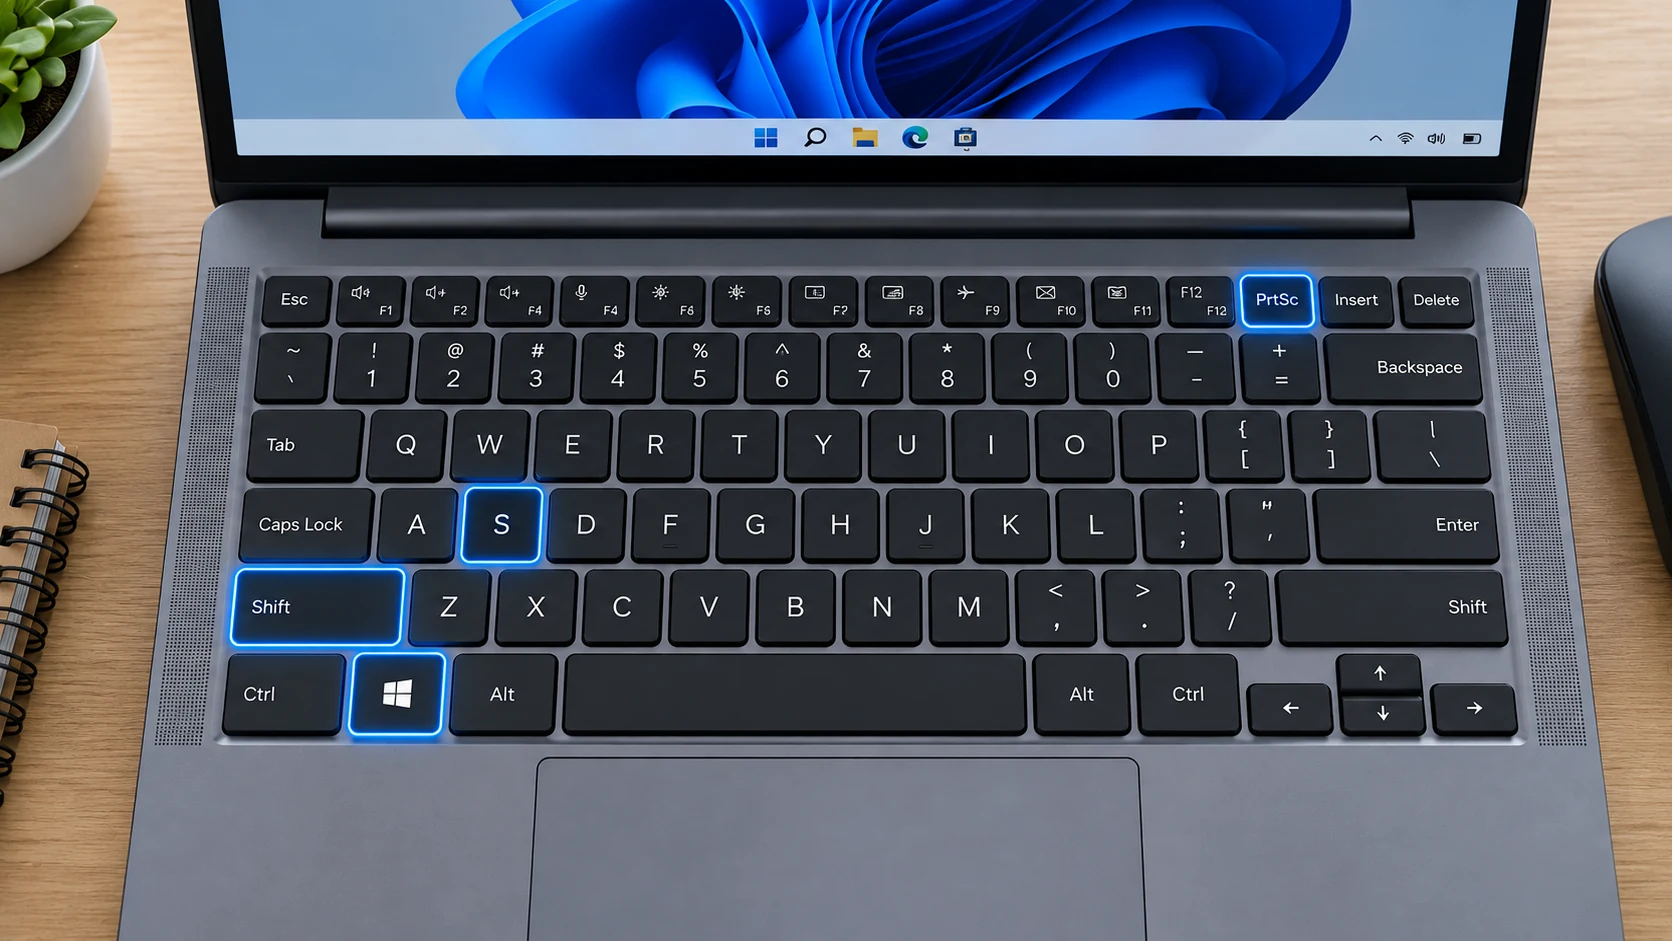
How do I take a screenshot?
hold down Win and Shift and press S = Choose Rectangle mode, drag across the area you need, and release. The captured image is available on the clipboard; review the preview before saving or sharing.
How do I paste the captured image?
hold down Ctrl and press V = Click inside an app that accepts images, then use Ctrl + V. Check that the pasted capture is the one you intended before sending or saving it.
Where should I paste it? I just need a (graphics) file.
- Start “Paint”
- Paste
- Save
How do I save the whole screen directly as a file?
hold down Win and press PrtScn = Windows captures the entire screen and saves it as a file in the folder Pictures › Screenshots.
On older versions of Windows, press Print Screen (PrtScn) instead. It copies the entire screen to the clipboard.
Current Screenshot Methods
This guide covers the current built-in screenshot methods, including the main shortcut, partial or window capture where supported, save locations, editing, long-page capture, and common problems. Feature names can vary slightly by operating-system version, device model, and region.
Windows + Shift + S opens Snipping Tool for rectangle, window, full-screen and free-form capture. Windows + PrtScn saves a full-screen PNG; Alt + PrtScn copies the active window. Windows has no single universal scrolling-screenshot shortcut for every desktop app.
Where Are Screenshots Saved?
Saved screenshots normally appear here: Pictures › Screenshots. Clipboard-only captures are not permanent files until you paste or save them. If cloud backup or a custom save location is enabled, the exact folder can be different.
Windows captures the entire screen and saves it as a file in the folder Pictures › Screenshots.
How Many Screenshots Can You Take?
There is no normal one-screenshot limit. You can take captures repeatedly until storage becomes the practical limit. When a method uses only the clipboard, a later copy can replace the previous item unless clipboard history is available.
How Do Scrolling or Full-Page Screenshots Work?
Long capture is available only when the current app or page supports it. Use the platform’s built-in long-capture control when it appears; otherwise use a browser full-page tool, export to PDF, or take overlapping screenshots.
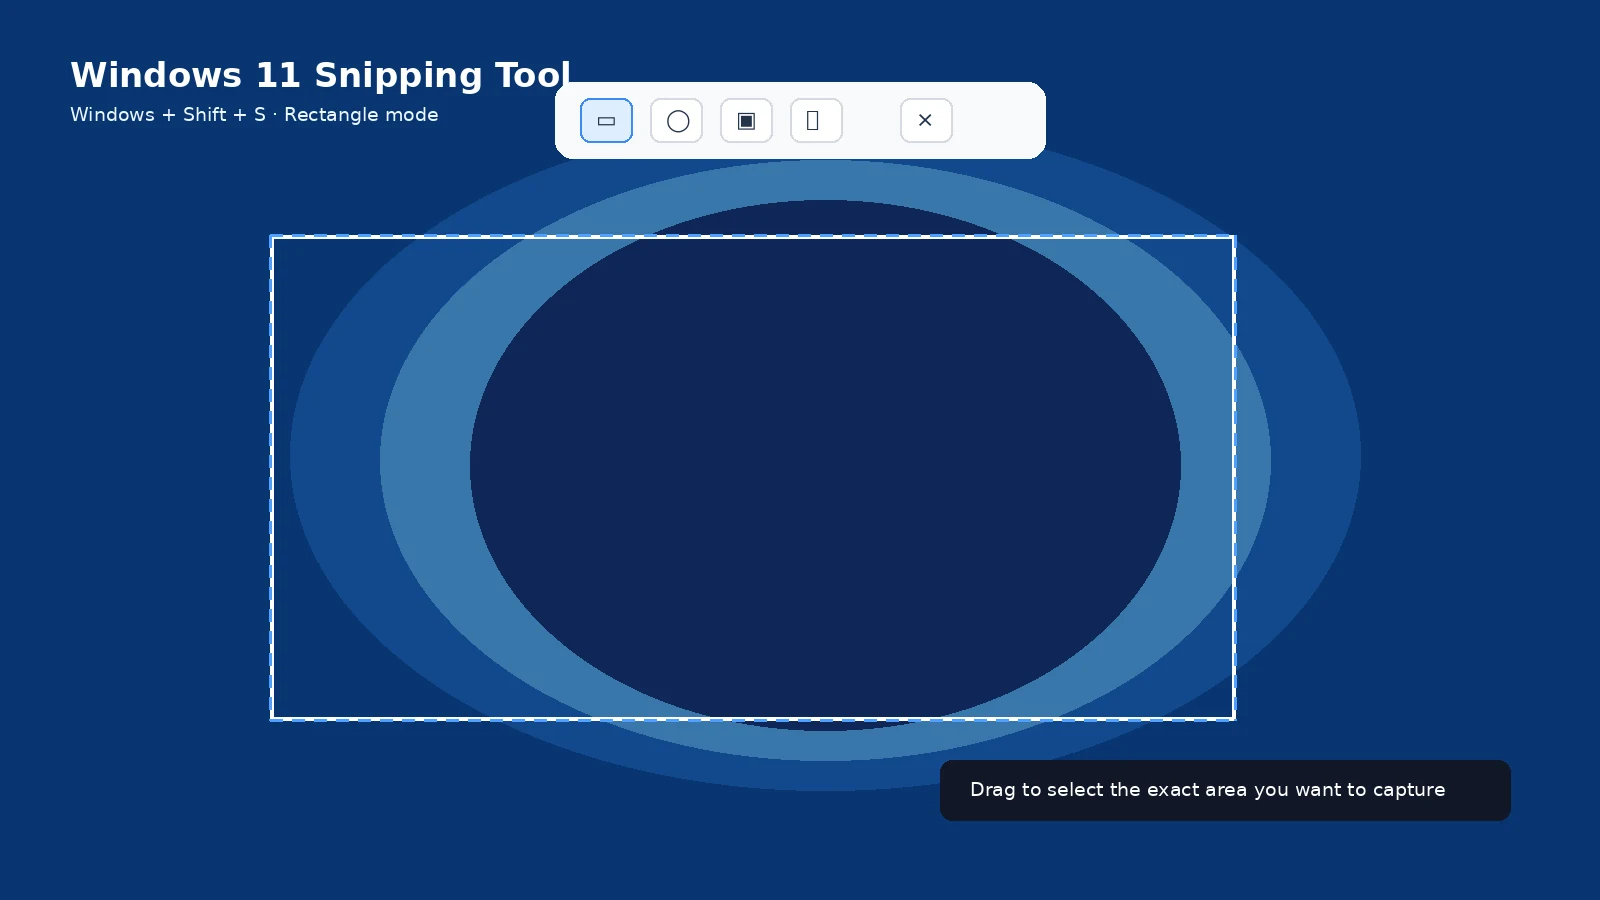
How Do You Capture Only Part of the Screen?
Use the platform’s region or selection mode when it is available. If there is no partial-capture tool, take a normal screenshot and crop it immediately. Keep enough surrounding context to make the image understandable, especially when the screenshot documents an error or a setting.
How Do You Capture One App or Window?
Use the window-capture mode or the platform-specific active-window shortcut when one is available. Select the correct app before capturing and check the preview so another window, monitor, menu, or notification was not included by mistake.
What If You Cannot Find the Screenshot?
Check the platform’s normal screenshot album or folder, then look in recent files and search for Screenshot. Remember that some shortcuts copy only to the clipboard and do not create a file until you paste or save the image.
What Changes on Laptops, Tablets, and External Keyboards?
Button and key placement can vary by model. Compact keyboards may require Fn, tablets can use physical side buttons or on-screen controls, and external keyboards may replace a dedicated screenshot key with a function-key shortcut. When in doubt, use the operating system’s on-screen capture tool.
Can You Take a Screenshot Without the Main Shortcut?
Many platforms provide an on-screen capture button, Quick Settings or Control Center action, accessibility shortcut, stylus action, or voice/assistant method. Availability depends on the device and version, so use the built-in alternative offered by your system rather than an unknown third-party app.
Which File Format Should You Use?
PNG is usually the safest choice for interface screenshots because text remains sharp. JPEG can be smaller for photographic content, while PDF can be better for documents or supported full-page captures. If the screenshot is evidence, keep the original file as well as any edited copy.
How Do You Edit and Share a Screenshot?
Open the screenshot preview or the saved image to crop, annotate, copy, share, or delete it. Before sharing, check notifications, names, account details, QR codes, passwords, and any private content that is not needed.
What If the Screenshot Shortcut Does Not Work?
Press the shortcut once with deliberate timing and try the main built-in capture tool as a fallback. Also check whether a case or keyboard mode blocks the buttons, whether the app intentionally prevents screenshots, and whether the capture was copied to the clipboard instead of saved as a file.
Image Quality and Privacy
PNG or the platform’s default lossless screenshot format is usually best for interface text and icons. Crop to the smallest useful area and remove sensitive information before uploading or sending the image.
When Should You Record the Screen Instead?
Use a screenshot when one still image explains the issue. Use screen recording when movement, timing, a menu sequence, or an animation is important. Record only the shortest useful sequence and review it for private information before sharing.
Can you show me in a video?
Official documentation: Microsoft